Tuesday, November 20, 2018

21 reasons to be thankful journal


November is my birthday month and I have been working on  a 21 days to be thankful journal, since my birthday falls on the 21st!
I decided to choose one moment each day to celebrate and be thankful for.  I am using the brand new Journal Studio  collection collaboration from Heidi Swapp and American Crafts and I couldn't be more happier with the outcome so far. Today I want to share the first part of my journal with you.


I started with the Think Happy journal and added the numbers from the ephemera pack.


My first page has a full size photo of my husband and then I use two cards from the Ephemera pack to embellish the left page. I added some journaling using my We R Memory Keepers Typecast typewriter and stamping using Kerri Bradford stamps.


On page 2, I used the fun new Kelly Creates  Brush Lettering Kit , which includes the word stamps and grey ink which allows you to stamp the word and trace over with pens- an easy way to get the brush lettering look.


Ive decided to add my journal into this gorgeous "Give it all you've got" journal cover, I love the soft pretty pink.


Day 4 I used that gorgeous pattern paper from Emerson Lane to cover the left hand side and used one of the tags from the Ephemera pack and my We R Memory Keepers Typecast Typewriter for my journaling.


More gorgeous pattern paper from Emerson Lane covers the right hand page, I added a strip of washi from the washi pack down the centre of the journal  and that fun " plan of Action" sticker from the Sticker booklet.

I also added some strip journaling to some of my pages. I used the new We R Memory Keepers Mini trimmer which is part of the Journal Studio collection  to cut my strips up. It makes it so easy to get precise cuts on smaller pieces and paper and cardstock.


I had to use that gorgeous Flamingo pattern paper from my stash from the Pineapple Crush collection as it matched my photo perfectly. I added some of the Epoxy stickers to accentuate my photo.


My final page to share so far, uses one of Heidi's handwritten words that you can find here that I cut with my Silhouette and sprayed with some Navy Colorshine. I layered it over the sticker from the sticker book that I ran through my Typecast Typewriter to add my journaling.
I just love how my journal is turning out and  I cant wait to share more!

Photobucket

Thursday, November 8, 2018

Friendsgiving celebration !


Recently a group of  friends and I got together for a Friendsgiving celebration! We travelled for two hours to stay in a beautiful old homestead. I had the job of decorating the table. I gathered some greenery from the local area and some beautiful native flowers and got to work.

Heidi Swapp Friendsgiving!

I laid some long greenery along the centre of the table.

Heidi Swapp Friendsgiving!

I then added glass jars wrapped in twine in and around the centre greenery. I then placed different types of flowers into each jar.

Heidi Swapp Friendsgiving!

I then set about creating my place settings.

Heidi Swapp Friendsgiving!

I laid a fun napkin on the plate then added a sprig of wattle over the top.

Heidi Swapp Friendsgiving!

I then created a place setting using powerpoint and printed them off onto some pink pattern paper from the Heidi Swapp Emerson collection. 


I cut them out with my circle cutter , punched a hole and threaded through some twine!

Heidi Swapp Friendsgiving!
I purchased some bottles of honey from a local supplier as special gift for each friend. I  created a sweet note to attach to  the bottle. 


I printed them onto some Bazzill cardstock, trimmed them into a tag shape and then used some American Crafts  Moxy Glitter and a strip of double sided adhesive to add a shiny glittery bottom edge to my tag. I then tied the tag to the honey bottle with some twine.
I trimmed some more pattern paper from the Emerson Lane collection into circles and adhered to the top of the bottle lid for a cohesive look.

Heidi Swapp Friendsgiving!

Once the table was set I added a few more touches.

Heidi Swapp Friendsgiving


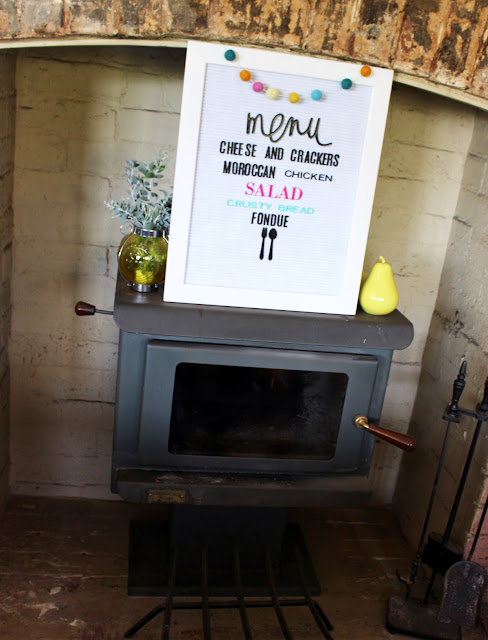
My Heidi Swapp letterboard was setup on the beautiful vintage fireplace. I added the menu items of our meal onto the letterboard. 

Heidi Swapp Friendsgiving!

I then set up another set of shelves for a special project I had in store for my friends. 

Heidi Swapp Friendsgiving!

I used my Heidi Swapp Lightboxes- the original and the shelf lightbox and my Heidi Swapp wooden word which I had previously glittered in mint Marquee Love glitter to add some inspiration to the shelf.

Heidi Swapp Friendsgiving!

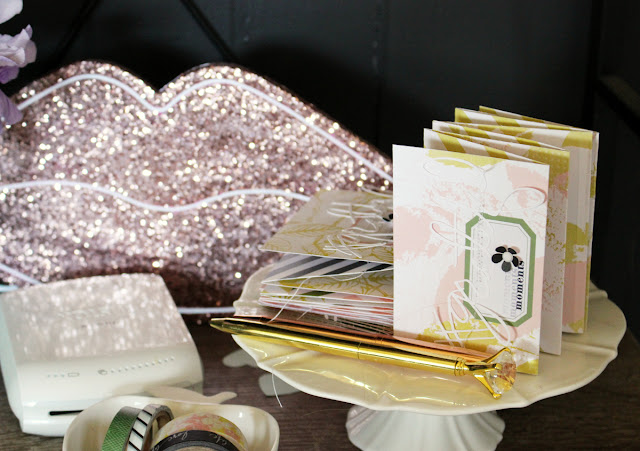
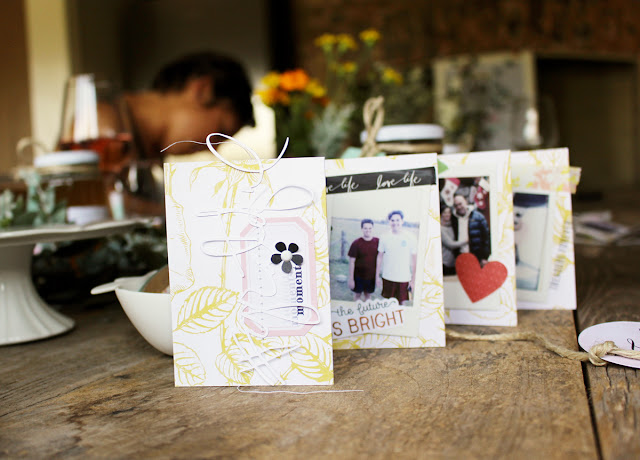
I then set up my concertina mini albums- one lovingly made for each friend , some Emerson Lane washi and my Instax printer .

Heidi Swapp Friendsgiving!

On the front cover I used the Heidi Swapp word Grateful that I cut with my silhouette. The mini album was made using one sheet of pattern paper from the Emerson Lane collection, trimmed in half then folded concertina style, and adhered together. I added stamping, sticker labels and stitching t embellish the cover.

Heidi Swapp Friendsgiving!

Once all was set up I went about photographing everything for my memory keeping!

Heidi Swapp Friendsgiving!

We had a delicious lunch and sat around laughing and chatting.

After lunch I gave my friends a little gratitude task to do. They each received their little album. 

Heidi Swapp Friendsgiving!

They then had to go through their camera roll on their phone and find three photos of things or people they were grateful for. They spent quite a long time scrolling, one of my friends -Jan remarked it was so hard to choose because there were so many memories to be grateful for!

Heidi Swapp Friendsgiving! 

The photos and memories bought out lots of laughter! They all shared their photos and memories with each other.

Heidi Swapp Friendsgiving!

I love the excitement that was shared during this time.

Heidi Swapp Friendsgiving!

Next they sent me their chosen photos and I printed them with my Instax printer using the app on my phone.

Heidi Swapp Friendsgiving!

I then shared how to add the photos and embellish their pages.

Heidi Swapp Friendsgiving!

I handed out some of my American Crafts sticker books-  Heidi Swapp, Paige Evans and Vicki Boutin.

Heidi Swapp Friendsgiving!

The girls spent a long time finding the perfect wording  and stickers for each photo. 

Heidi Swapp Friendsgiving!

I loved seeing the determination and dedication on their faces.

Heidi Swapp Friendsgiving!

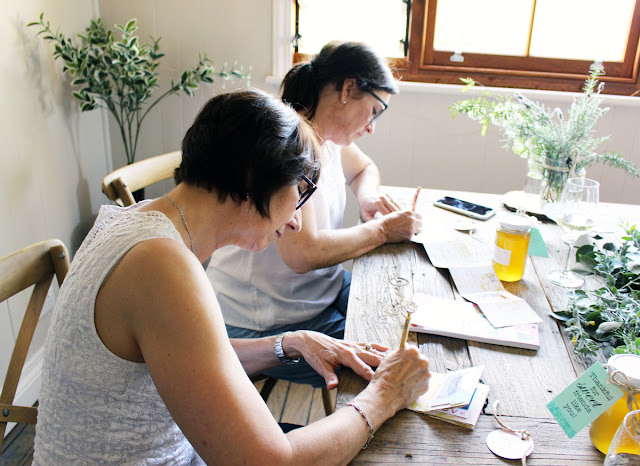
I then asked them to write down their thoughts on why the photos and memories filled them with gratitude!

Heidi Swapp Friendsgiving!

Heidi Swapp Friendsgiving!

They really took their time in writing down their feelings!

Heidi Swapp Friendsgiving!

I loved that once they were all finished they took the time to look at each others mini albums. 

Heidi Swapp Friendsgiving!

Everyones album was filled with beautiful stories and memories. The albums were the perfect way to capture a little piece of gratitude. 
I loved sharing my passion of memory keeping and being able to find a way to share it with my friends. It really was a Friendsgiving to remember. 


Photobucket

Tuesday, November 6, 2018

Heidi Swapp Emerson Lane

 I am absolutely in love with Heidi Swapp's newest paper collection Emerson Lane. I love the mix of florals, stripes and the soft colour palette. Today I want to share two layouts I created recently!
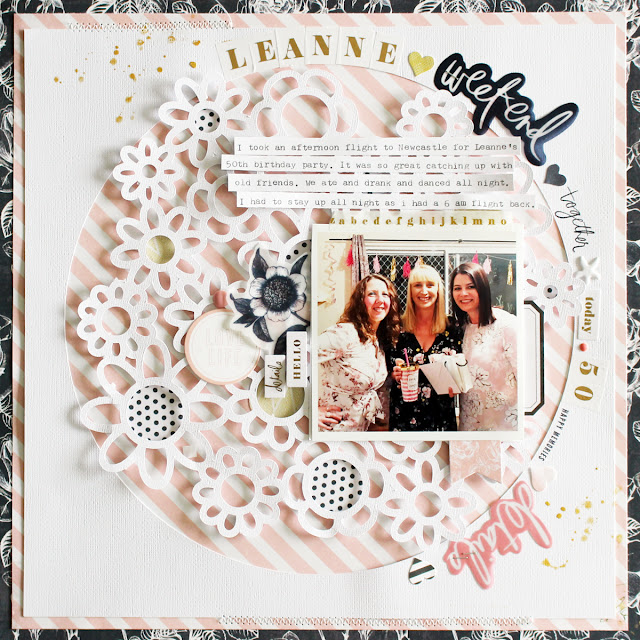
The first one, tells the story of a friend's 50th birthday recently. I layered a couple of the gorgeous pattern papers from the Emerson collection and then used that lovely cut file from Paige Evans as a base for my photos.

Heidi Swapp Emerson Lane

I had two photos I couldn't decide between so I added a flap with some of the washi from the collection.

Heidi Swapp Emerson Lane

I used some of the ephemera, acrylic stamps and the gorgeous washi alphabet to create my title around the circular shape. 

Heidi Swapp Emerson Lane

I love how it turned out.
My next layout about my youngest son and his surgery last year. I used that fun cut a part pattern paper as my background.

Heidi Swapp Emerson Lane

I then added my photo and clustered my elements around the photo including my title using the thickers in Heidi's trademark handwriting!

Heidi Swapp Emerson Lane

The envelope from the collection adds the fun final touch to my layout.

I cant wait to get scrapping again with this new collection, I hope you love it as much as I do!


Photobucket

Saturday, October 6, 2018

Neon lights in a boy's room!

We recently had to undergo a small renovation in my eldest son's room. I was pulling off some older decals from his wall and unfortunately it ripped some of the paint off the wall. We made a quick trip to our local hardware store and grabbed some new paint for a feature wall. Now my son is Space crazy so we had to decorate with some Space themed decor!

Heidi Swapp Neon decor in a boy's room

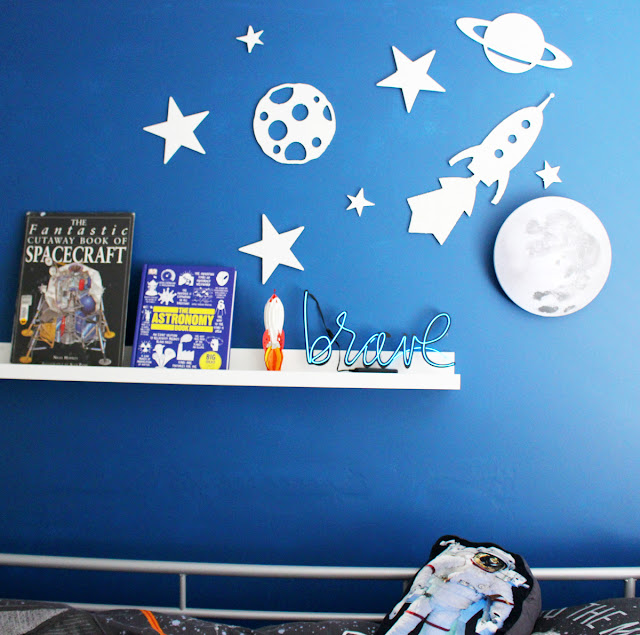
Once the new paint was dry I set about with a little DIY decorating!  I hung  the wall shelf from IKEA and added some hand painted wooden Space shapes to the wall too. 

Heidi Swapp Neon decor in a boy's room

I then grabbed one of my Heidi Swapp Neon words- Brave,  which I painted black and then when dry, threaded through the Blue Neon wire. 

Heidi Swapp Neon decor in a boy's room

I added the Neon word to my shelf. He now uses the Neon word as a Nightlight! 

Heidi Swapp Neon decor in a boy's room

I love the glow that it creates !

Heidi Swapp Neon decor in a boy's room

The word sits on top of switch mechanism so it is easy for him to turn it on and off!
an bag 
Heidi Swapp Neon decor in a boy's room

Finally I added in the  framed print of the Saturn V and a new beanbag and book shelf so he can read in his room. 
He was kinda blown away by it all and just loves it! What started as a quiet Sunday morning, quickly turned into a whole new room! Somedays are like that!


Photobucket